The Calls tab in your AnswerConnect App tracks information about your callers such as name, phone number, and email.
When your customers are included in your Contacts, their information will be available to our receptionists. This helps reduce call time and increase the accuracy of your messages.
Rather than ask customers to spell their name, for example, they can instead confirm it. The information is already stored in your AnswerConnect App.
Adding your contacts to the app will automatically add them to your AnswerConnect mobile app. So your contacts are available no matter how you access your account.
So how do you add your contacts to your Contact list? We add them automatically when they call in, based on caller ID. However, you can import a comma-separated values (CSV) file of your contacts at any time.
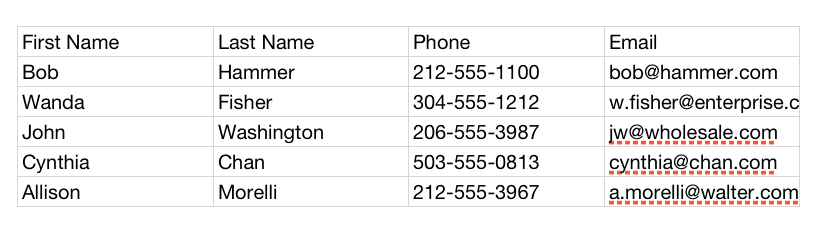
Your CSV file should include the following fields, in the following order: First Name, Last Name, Phone, and Email. You can export this from another app, or create it manually in Excel, Google Sheets, or another spreadsheet program and then save it as a CSV file with the .csv extension.
Once you have created your CSV file, you can go into your AnswerConnect App and upload it with just a few clicks.
- Go to Settings
- Select My Directory
- Select Contacts
- Click on the +
- Click on Import Contacts
- Find your CSV File on your device and select Upload
- That’s it! You should see your uploaded contacts on the list.